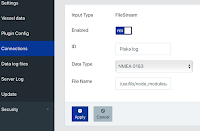
The easiest way to test Your OpenPlotter, OpenCPN or SignalK(SK) applications is to use the supplied sample files in SK. Another way is to capture Your own data from a sailing trip, which is described here. Then You can use them instead of the supplied sample files.
A fantastic way to distribute data between devices is using MQTT. In this post I will do a quick and simple setup with Node-Red(NR) and the Mosquitto(MQ) broker on a Raspberry Pi. Very short, the Broker, installed on a server, handles incoming Publishing and Subscriptions from clients. Every published Message is "linked" to a Topic. All Subscribers use a Topic to "link" to the right Message. How to install Node-Red(NR) is found here and the MQ manual here.
There have been some questions about how to handle Homebridge, (HB), autostart at power on and restart at failure using Raspberry Pi OS systemd. Please note that, in the later versions, the HB installation handles this !!
I have written a post how to manually set it up but now in this post I will present a script which handles it automagically !! Despite this simple set up I recommend using the app " hb-service", which is installed together with "homebridge-config-ui-x"
With HomeBridge installed on a Raspberry Pi, (RPi), You just install the homebridge-ring plugin and the Ring accessories will appear in Apple HomeKit This post will cover the Ring video doorbell but is a guide for other Ring products. Prerequisites
This Blogpost was initially made before the IKEA outlets was enabled in the Apple Home app. They could then just be reached via a Tradfri Homebridge plugin. Since a while blinds are supported by this plugin but not by the IKEA Gateway and app so maybe its time again to install it ? Another post covers the installation of the Trådfri gateway with a HomeKit approach. (Without Homebridge)
Updated 2019-08-10 ! New to Node-Red(NR) and maybe start with a simple application You can benefit
direct from ? This application is measuring Your Internet connection at chosen intervals
using Speedtest.net and showing
the result in a graph. If the speed is under a set value it will send You
an email.
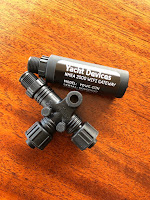
My thoughts, about NMEA WiFi have finalized ? since my first post in the subject and the Yacht Devices YDWG-02N is now installed in my NMEA2000/ST/NMEA0183 network and works just fine. I'm already using Raymarine ST => ST NG converter but otherwise I had bought the YDNR-02 instead which should have done the same job. Please find some thoughts from the installation below.
Updated 2019-05-11 ! My old Mac Book Air, mid 2011, didn't support the latest MacOS, Mojave. So after some checking I found this brilliant fix which did the job. This guy have really done a fantastic job with great instructions and even a Youtube video.
Running Weather 34, W34, using my setup, the program "cumulusdata.php" is fetching data from Davis Weatherlink(WL), and are writing the data to a file, type Cumulus. The old way was to fetch the data via a scheduled cronjob. Doing a small change to "windspeeddirection.php", "updater.php" , and using the latest version of "cumulusdata.php", will do the update with the built in W34 refresh routine instead of cron job. Thanks to Ken who gave me the hint.
Do You have Telldus devices up and running and want them to be visible and used in Apples Home app ? With some software and a Raspberry Pi(RPi) they will appear in the HomeKit environment.
I bought the Gledopto RGB+CCT LED controller(GO), so I could use RGB LED strips, not just the IKEA ones. There were some IF:s, which will be scrutinized below, but it worked.
!! Note !! Before Monterey !! As a part of one of my projects, the ultimate Weather site ?? Weather34(W34), I needed a WEB-host with PHP and started to use a Raspberry Pi. In this post You will get some short install tips on Apache with PHP on a Mac with Mojave, macOS 10.14.x, and at the end of the post the W34 installation is done.
Updated 2019-09-02 ! If you think it's ok that the broadband speed appears as temperature in Home apps this plugin is very nice.
The plugin, used with Homebridge(HB), measures Your broadband speed at chosen intervals. If You use the free app "Eve for Homekit", besides that it shows the last measured broad band speed, it also shows the speed history in a nice graph.
Prerequisites is listed in the beginning of the post for installation on Raspberry Pi(RPi) You will find migration information, from WeatherLink 1.0 to WeatherLink 2.0, in this post
Extending Your WiFi via cable have the advantage, compared to extending via WFi, that You keep the bandwidth at max. Extending Your WiFi with products that use the same frequencies, as Your WiFi, will just put through 50% of the data flow.
One way to extend the WiFi is with a cheap router, or maybe an old router You don't use any more.
Updated 2019-02-05 ! Using Homebridge for a while, getting nice hardware to emulate Apples HomeKit devices, I finally decided to test IKEA:s Trådfri concept. The actual device that I was interested in is the wireless control outlet. But they have bulbs and other stuff that is really nice priced.
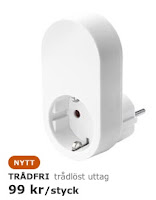
This post will cover an installation of the Trådfri gateway with a HomeKit approach.
Upgrading from Jessie to Stretch can break the entire system so ALLWAYS do a backup. There are several sites/posts with "how to" information but the Raspberry site, the Linuxconfig site and the Superuser site, (where You can find more details about the upgrade), made the base for this post.
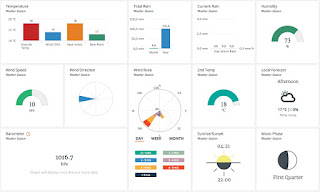
During summer 2018 Davis are updating WeatherLink to 2.0 (WL2). So if You have registered devices before 2017-11-28 You must migrate. This update is changing their website, as shown in picture, and API. Their API documentation is found here
The following information is sent out in 2018-06 to users who still haven't upgraded to WL2
Updated 2018-06-07! The SignalK server(SK), the engine in OpenPlotter(OP) is coming with new releases pretty often and if You want to update, having used OpenPlotter RPI V0.10.0 NOOBS, the following instructions will help You.
I really recommend to start all over with a new fresh installation with the new OP V1.x.x.
TP-Link Deco is a smart Mesh system that extends Your WiFi. It is pretty easy to install but there is no direct information in the install app, Apple or Android, about how to interconnect the Decos with ethernet. Especially if You must keep the old Router. Connecting via ethernet is faster and more stable and also necessary if the Decos WiFi can't reach each other.
In a former post a I presented our approach to mix a modern NMEA 2000(N2) network with the older Raymarine ST 1 network, installed 2006. During the Years it has grown and been added with new functions. The pictures to the right is the actual layout. The first add on was a N2 GPS described here.